Lots of parts
By Xevel on Friday, February 4 2011, 09:11 - Eurobot 2011 - Permalink
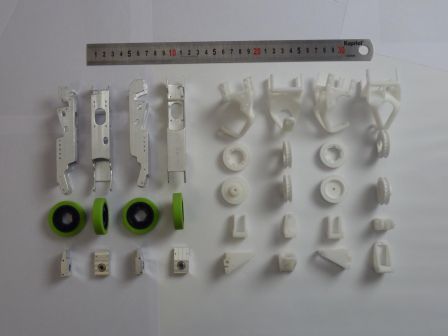
This week and the last, I received all the CNC milled and 3D printed parts for the legs!
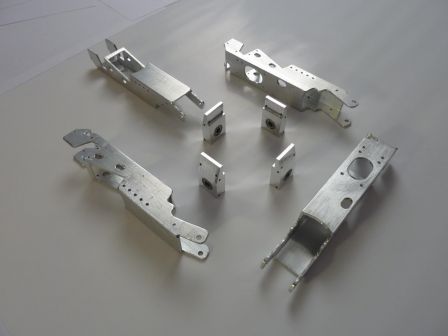
CNC milled goodness
The main element of the tibia is carved into 20x20x1.5mm square tubes (many thanks to the guys at AIPL!). The smaller part is used to support the wheel axis, and fits inside the tube. Having the two ball bearing fit tightly inside the bloc proved to be a challenge as the first ones I bought were a little too cheap and deformed when inserted. Sourcing parts from a better supplier solved the problem, but I still lost a week on this ><.
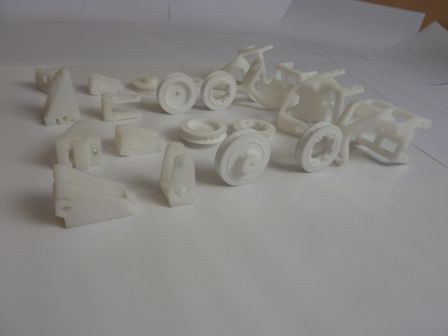
Sweet 3D printed stuff
Then we have all the 3D printed stuff, made by the awesome guys at i.materialise. I designed five different parts, three of which are printed in ABS (ivory white) for rigidity and dimensional accuracy, and the other two in polyamide (white) for better details. It's interesting to see that in fact polyamide can be pretty rigid too when used with >4mm thick walls.
This "big" and convoluted part makes the junction between the Dynamixel servos and the custom made tibia. I noticed quite a few design faults (a missing bevel here, a hole too small there...), but nothing unsurmountable. I should probably have made it with bigger walls: it deforms a little too much to my taste when twisted along the longitudinal axis (which will happen in normal operation). Also it's a little too fragile around the hole where the ball bearing is inserted. I actually cracked one when trying to put the bearing the first time... luckily I could repair it by putting a droplet of acetone on the crack. After 5 minutes the two sides were neatly fused together again.
This one holds the servo used to orient the wheel (14g, 1.4kg.cm, analog, metal gears). Its axis is aligned with the contact point between wheel and ground, hence no need for tremendous torque.
I had a little surprise when I drilled the holes... some support material was left inside the part, and when the drill bit hits this material, it makes a breaking sound... Gave me quite a scare, I thought the drill bit or the part had just shattered ^^".
Last ABS printed one. It serves two purposes: providing a second attach point on the servo axis, and holding the motor in place at an adjustable position. While it does perfectly well at the first task, I'm afraid I kind of messed up concerning the second one.
The motor is clamped between the two flexible sides of the part. Two screws and nuts passing through the holes above and below the motor provide the clamping action. From the few test I have made so far, this system is able to block the motor in place, but it pretty quickly start to slip under the action of the tension of the belt. Also, signs of fatigue are visible on the part, as well as cracks around the holes... I think I will need to redesign it to be less adjustable (now I that I have the whole system at hand, I know the desired position of the motor with a very narrower margin) and more robust. I also think will not rely and the material flexibility this time, and/or I'll switch to polyamide.
Last but not least, the two pulleys. I received three of each in polyamide and one of each in ABS, and all of them are perfectly functional. I'll go into more detail about those in a future post.
Final words
I find the overall quality of the assembly extremely good, however I'm not used to playing with such precision tools, so maybe I'm easy to impress. Compared to the hand-made stuff I did until now, it's a big leap in term of quality and repeatability!
I'm pretty satisfied with the 3D printed parts (except the motor support). It's the first time I use this kind of service, and it opens a whole new world of possibilities, at an affordable prince.
Here are at random a few things I learned along the way (take it with a grain of salt): - if you want to have a screw or an axis going through a hole, make it the right diameter from the get go. - if you want to tap a hole, make it smaller than the recommended initial drill diameter, 0.2mm less if it's polyamide, 1mm less if it's ABS. - ABS is easy to drill and easy to tap, polyamide is relatively easy to drill but not that easy to tap. Use the 3rd tap a few times if you have important length of nylon screws to put in... - always check, check and check again your CAO before sending the parts for printing -_-"
Anyway, now I have to work on redesigning the problematic part, then assembling all of these, and do all the electronics and wiring... still a lot of work left.


