Xevelabs

To content | To menu | To search

Friday, January 17 2014

USB2AX firmware update

- this dates back a few weeks, but I forgot to publish it! -

The updated firmware guide is available on the documentation wiki!

Recently, I got reports of USB2AX units that did not function properly with Robotis' Dynamixel wizard. Those were brand new units, and multiple simultaneous hardware failures seemed unlikely. Time to investigate.

On my computer, nothing strange, as always, the famous "It works for me" syndrome. However, I noticed that a RoboPlus update was available, and, thinking nothing of it, I started downloading it while searching for a way to repeat the problem at home.

As you might have already guessed, the new version of RoboPlus turned out to be the trigger element, and what is comes down to is the addition of support for Dynamixel PROs.

It appears that the Dynamixel PRO line uses a different protocol named Dynamixel 2.0. This protocol is more complex than DXL 1.0, with more header bytes (4!), longer adresses (2 bytes) and longer CRC (2 bytes), and a lot of new commands and cool features.

The fun thing with the Dynamixel Wizard is that even when you want it to search for DXl 1.0 devices, it sends a DXL 2.0 broadcast ping. And this ping looks like a DXL 1.0 packet addressed to 0xFD (the id used by the USB2AX), with a length of 0 bytes (which does not play well with DXL 1.0 as it's supposed to be >= 2), and a command ID of 0xFE.

As Murphy's law dictates, this ping 2.0 just so happened to fall in what seems to be the only place in the USB2AX parsing state machine where it could be stuck... which explains that after that, nothing would work anymore.

This is a good reminder why testing inputs with fuzzing techniques and trying to make completely fool-proof input parsing code is important. Luck has it that something will always happen to your program fail even when it is very unlikely.

Thursday, April 11 2013

USB2AX release

Hey lads!

After so many twist and turn of the road to release, the USB2AX is finally officially here, and available for all.

circle_pic.JPG

For thos who have not followed the 2 year development process (!), the USB2AX is a very small programmable USB interface that allows a computer to talk directly to Dynamixel servos, like the AX-12 or MX-xxT. I developed out of the need of such an interface to get Xachikoma to work.

Have a look at www.xevelabs.com for documentation and list of reputable distributors! Other distributors are coming soon, even in the US ;)

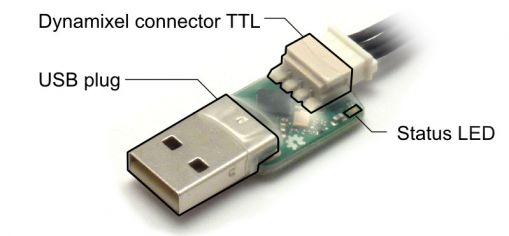
Main components: Dynamixel_parts_top.jpg

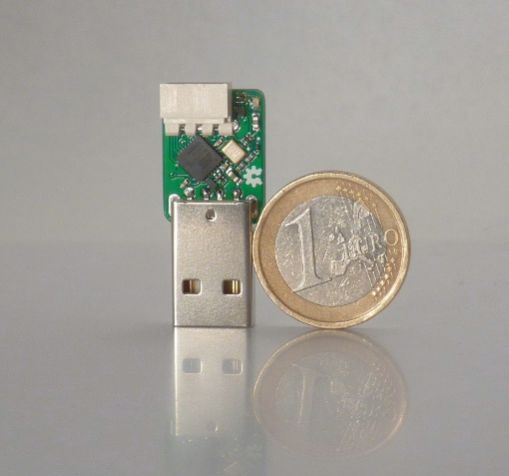
Size comparison: usb2axv31_front_euro_s.JPG

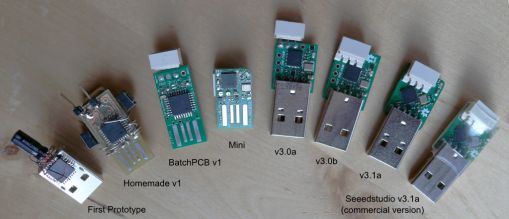
The whole familly picture: USB2AX_Family_named.jpg

Wednesday, April 4 2012

USB2AX mini

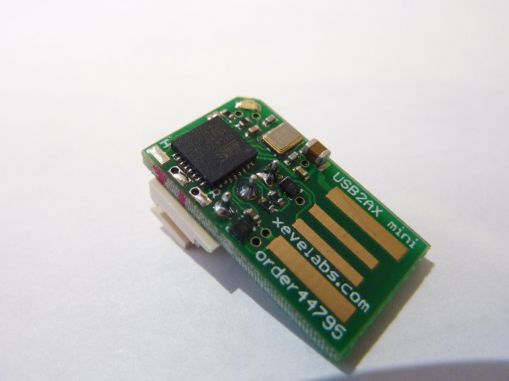
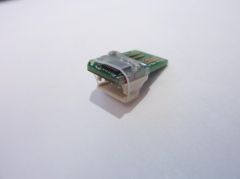
The USB2AX project is still on track (more on that in a next post). As a little side-project, I wanted to have a try at making the USB2AX even smaller while retaining all the current characteristics (ATmega32u2, ESD protection, LED, etc). That's how the USB2AX Mini came to be.

USB2AX_Mini___12_.jpg

The motivation is just to have fun and satisfy my lust for optimization. Or some might say pseudo-optimization here since by over-optimizing size, some other aspects of the device suffer, like quality of the physical connection (resistance to vibrations and yanking). But hey, this one will most probably never go beyond the prototyping stage, so please leave it to that.

I wanted to stay away from some obvious ways to make it smaller, like putting components on both side, using components too-small-to-be-soldered-with-my-crappy-prototyping-tools, requiring custom mechanical parts (like the ones used in the miniature bluetooth or WiFi dongles, with the electronics inside the USB plug) or cutting functionalities (ESD protection, status LED...). Thus it had to be possible to assemble with the same tools I already use and keep the nearly the same BOM as the v3.0. Working on the connectors seemed like the way to go, as they occupy around 75% of the board real estate.

The ideas here are:

  • use a PCB USB connector, with gold fingers this time (saves 10mm)
  • move the dynamixel connector so it is the closest possible to the USB plug, on the other side of the electronic components (saves around 5mm)
  • route the USB lines between the Dynamixel connector's pads (saves still a little bit more)

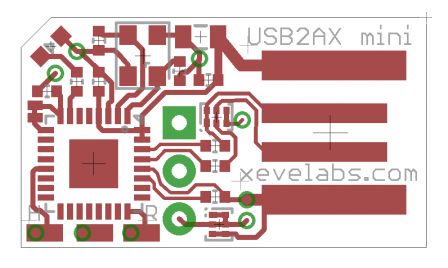
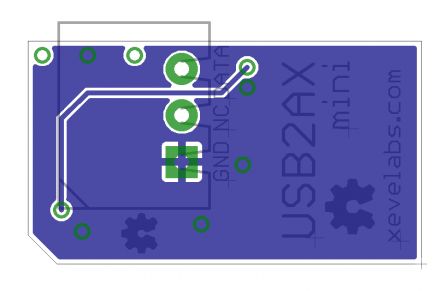
And that's the result:
usb2ax_mini_top.png
usb2ax_mini_bot_mirror_.png

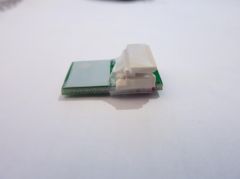
With a total length of around 22mm (compared to the 37mm of the V3.0), it already looks a lot smaller. However, by moving the Dynamixel connector a few millimeters inside the PCB, the actual length when measuring the device with a Dynamixel cable plugged in is 17mm shorter (41mm for the v3.0)!

From an electronics standpoint, it's nearly identical to the USB2AX v3.0. The only thing that changed is that instead of protecting each line of the serial port with a 47ohm and the anti-ESD chip, and then connecting them, I connected them directly then protected the remaining DATA line.

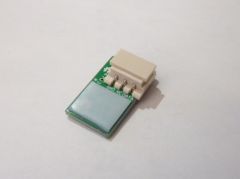
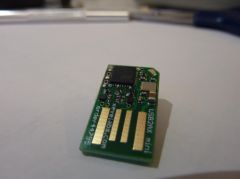
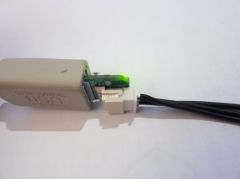
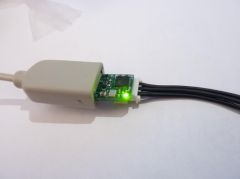
USB2AX_Mini___15_.jpg USB2AX_Mini___11_.jpg

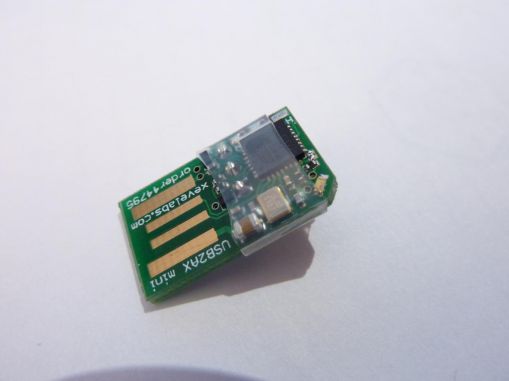
The PCB USB plug has, as expected, some disadvantages. Without modification, you have poor or non-existent electrical contact, that can be fixed by increasing the plug thickness with a piece of tape (here, I use 0.5mm thick Teflon tape). I could have had the PCB made with 2mm thick material, but it costs a lot more with Seeedstudio Fusion. The problems I used to have (see v1.0) with the electrical contact quality have been fixed by getting the board gold-plated (ENIG), with additional gold fingers on the contact pads.

USB2AX_Mini___20_.jpg USB2AX_Mini___19_.jpg
It feels like you are plugging the Dynamixel cable directly into the USB port :P

USB2AX_Mini___21_.jpg USB2AX_Mini___22_.jpg USB2AX_Mini___24_.jpg

I tried to protect the board with some heat-shrink tubing, but it tends to slip when shrinking, I had to do it 3 times to get this result.

All in all, I think it's a fairly cool little board, and it still does its job, so I'm happy with it :) As always, code and files are available in the Git repository :)

Tuesday, December 6 2011

The shape of things to come

USB2AXv3_with_heat_shrink.JPG

The USB2AX PCB will be a little wider so that the Dynamixel connector will completely sit on it, and also a little longer to let some room between the connector casing and the MCU.

Also the OSHW logo will finally get where it needs to be!

It's getting closer :)

Thursday, November 24 2011

USB2AX: the early days...

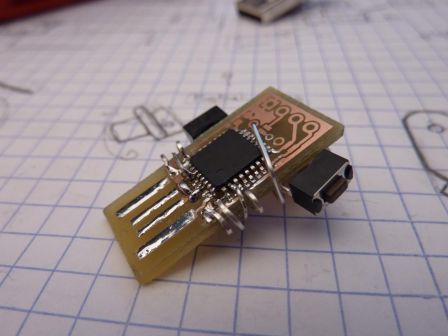
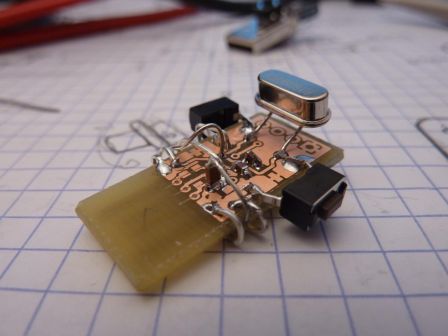
And now for a small lesson in ghetto prototyping, I present you the first two USB2AX!

v0.1

USB2AXv0.1_a.jpg
When you don't want to bother with a PCB...

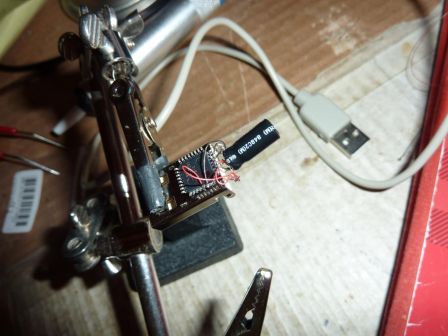
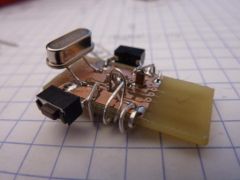
The very very first proto was a horrible mess. I had bought two ATMega32u2 in TQFP package, but without any idea on how to make the first version of the board. And suddenly, the idea to just not make one crossed my mind. All the wiring is done using Teflon-coated 36awg multi-strand found on a popular RC hobby website (I love this stuff, so thin!).

A few hours later I inserted this monster into an USB port of my computer, only to be greeted with... nothing. I thought the internal 8MHz oscillator of the ATMega would be enough to program it with the USB bootloader, but I was wrong, as I could have known had I RTFM a little more carefully.

USB2AXv0.1_b.jpg
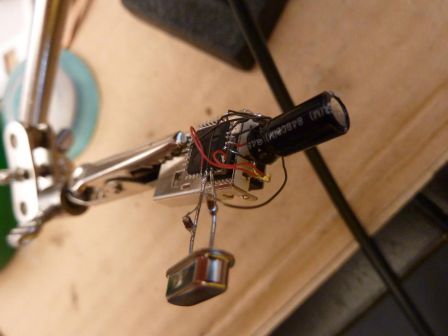
After adding the crystal...

So I installed a big through-hole 16MHz quartz I had lying around and began to look for pump capacitors I had not even thought of ordering. I finally unsoldered two from a nondescript board I had in my "electronic stuff" box, where I put all the scavenged treasures I always dream of making something from, and hardly ever do. The values might not be right, but it did the trick and I could witness for the first time the apparition of an "Atmel DFU" device in the device manager of my WinXP laptop! (At the time, Win7 64bits did not recognize the signature of the drivers provided by Atmel. This has been corrected.) That was enough to motivate me to continue working on the project, hopefully with some hardware that does not threaten to break just by looking at it!

v0.2

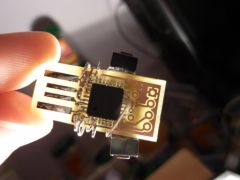
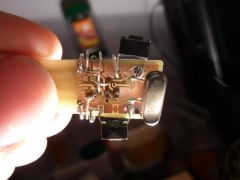
A few days later, JLG made the first version of the (2-sided) PCB, and I went to have some made with the good old etching method. One problem with that was the vias. The board had to have a few of them, and I could not find a suitable drill to bore them... so I had to improvise again. Meet the Punk USB2AX!

USB2AXv0.2_a.jpg USB2AXv0.2_c.jpg USB2AXv0.2_b.jpg USB2AXv0.2_d.jpg USB2AXv0.2_e.jpg USB2AXv0.2_f.jpg USB2AXv0.2_g.jpg
When you have a 2-sided PCB and no drill small enough to make the vias... let's just say "A man's gotta do what a man's gotta do" ;)

Some simplifications were made, again, when assembling it. The two 22ohm resistors on the USB lines are omitted (saves a few vias, and even if it's baaaaaad, it works...), and I did not put the LED and its resistor. Each remaining via is replaced by a ring made from through-hole component leads (these are always useful!), placed so that it would not touch any other of these "external via", or any component. For a small board like this one, it works surprisingly well. Once this board gave sign of life and had been tested with the USB to Serial example of LUFA, I could safely order professionally-made ones on BatchPCB.

That's it for today! Next time, I think I will talk about all the tribulations involved in turning the USB2AX into a commercial product! ^^

USB2AX

It's about time I talked about this one. This post has been a work in progress for more than 6 months!

The idea behind the USB2AX

The USB2AX board is the small programmable USB to AX and MX-series Dynamixel adapter we designed with my friend JLG, in the early stages of developing the Xachikoma.

Basically, it's a gizmo you plug into an USB port that creates a virtual COM port on your computer, through which you can communicate to Dynamixel servos. It behaves much like the USB2Dynamixel made by Robotis (in most cases, it's a drop-in replacement), but is limited to AX and MX series servos. It does not provide power to the servos, this has to be done by other means like using a SMPS2Dynamixel Adapter or a home-made power cable.

I made the design (mostly from things I learned from the Arduino Uno and Adafruit ATmega32u4 Breakout Board+, but adding my own n00b mistakes), and he made the first versions PCB, under the constant pressure of me asking to make the board smaller, SMALLER, SMALLER!
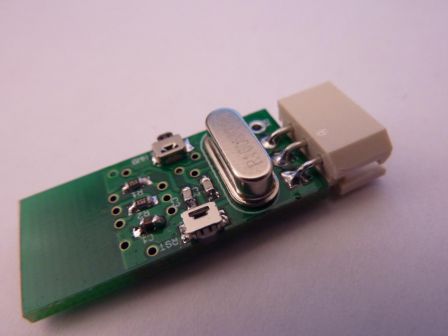
USB2AXv1_top.jpg
USB2AXv1_bot.jpg
Version 1

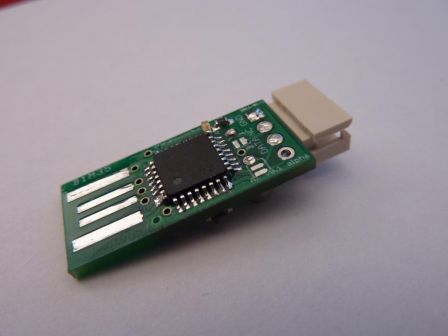
Making such a beast is far from being a new idea, yet my version is the smallest of the "clean" ones I know of, and it's more versatile than most. I would not have made it if I did not have a real need of it: I use 4 of them in the Xachikoma.

The core of the project is an ATmega32u2, a 8 bits micro-controller from ATMEL without much bells and whistles, but with a full-speed USB device port and an UART. Its little brother, the ATmega8u2, is used to replace the FTDI in the Arduino Uno, and its bigger cousin the ATmega32u4 will be the heart of the upcoming Arduino Leonardo. Having a micro-controller do the bridge between USB and the half-duplex serial bus used by Dynamixel actuators is interesting for two reasons: you can use software tricks to create the half-duplex line instead of having multiple components, and you can create more complex firmwares which not only channels bytes from one side to the other, but can perform treatments on them.

The half-duplex trick used here is the same some people use to make an Arduino talk to Dynamixels by just tying TX and RX together. This is also used by the Arbotix controller and others, just to name a few sources you can learn from. The idea is that in the ATmega, you can turn ON and OFF each part of the UART (receive, transmit), and when one is not used, the corresponding pin can be left floating (meaning it does not impose a particular logic level to what it's connected to). This way, you can leave the receiving part ON most of the time, and switch to transmitting mode only when you have bytes going from the computer to the servos.

The ability to update and experiment with the firmware is potentially a great strength: not only can you optimize the inner workings to lower the latency (compared to the usual FTDI chip), but you can also add nifty features by allowing the USB2AX to understand what it receives and to react to it. Instead of only transmitting bytes blindly, you can imagine implementing macro commands, like a SYNC_READ (iBot has done so). Another possibility is to change completely the way the computer sees the board. For example, you could make a joystick with force-feedback based on Dynamixels, and program the USB2AX to appear to the OS as a plug&play joystick, allowing seamless use of your über-joystick in any game!

Some inspirational material around the topic of "stuff speaking with the dynamixel actuators":
http://billyzelsnack-robotics.blogs...
http://www.siempreaprendiendo.es/pr...
http://www.pablogindel.com/2010/01/...
http://websvn.hylands.org/listing.p...
http://robosavvy.com/forum/viewtopi...

Latest developments

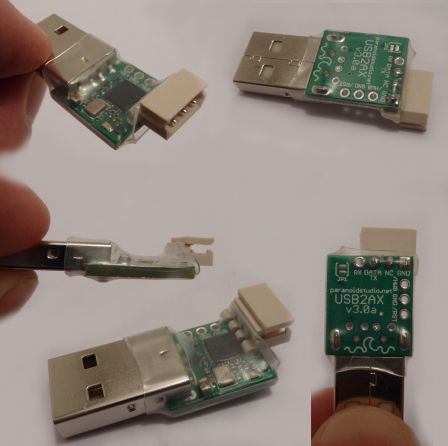
The latest version is the V3.0a (V2 never actually lived :/), and improves durability and reliability while still keeping a small form factor. Basically, this version should be roughly on equal footing with the USB2Dynamixel from Robotis when it comes to communicating with AX-series Dynamixels, just smaller and with slightly lower latency.
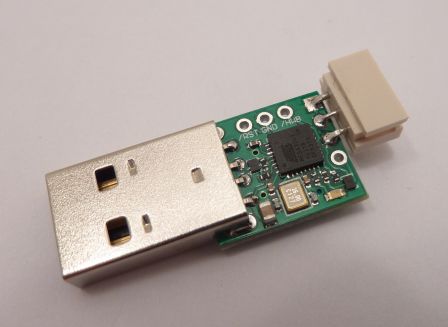
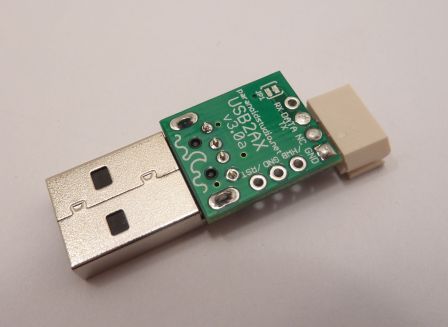
USB2AXv3.0a_top.JPG
USB2AXv3.0a_bot.JPG
The latest V3 prototype.

With a real USB plug, the risk of shoddy connection should be reduced close to zero. This causes a problem however, as the standard male Type A USB plugs are 20mm long, more than twice the size previously allocated to the plug and more than two third of the total length of the original board! That's why we remade the PCB from scratch, with better layout, smaller traces and smaller components where possible (0.5mm pitch QFN package for the ATMega32u2, small SMD crystal, 0402 capa and resistors...), even if it means that it can no longer be assembled with the good old soldering iron. That's an opportunity to practice reflow soldering with a hot plate, yeah :D Also added from the first versions are the recommended decoupling caps (!) and ESD protections on both USB and serial lines, to reduce risks of frying the board or any of the costly equipment connected to it.
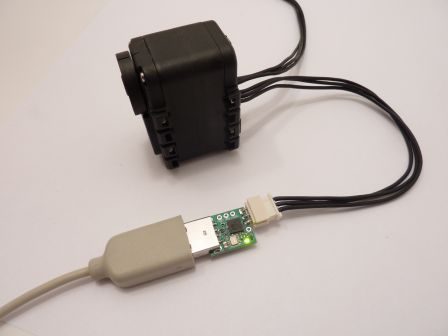
USB2AXv3.0a_conn_bent_top.JPG
a V3.0a, plugged and connected to an AX-12+.
P1010183.JPG
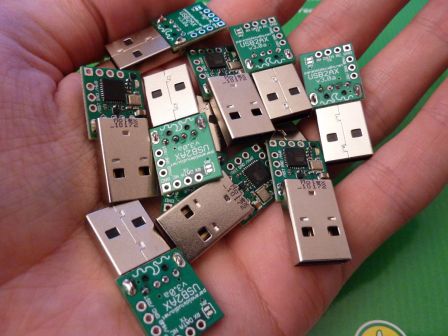
It took me a few afternoons to make all of these, mostly by hand...

USB2AX documentation, schematics, BOM, code

(and if you may wonder: ParanoidStudio is the name under which we hack robotics stuff with this friend).

I still have a few units of the improved version (better quality and durability). If you are interested in buying one, please say send an email at xevel {at} xevel |dot| fr ! A commercial version will most likely see the light of day in a few weeks/months too.

Some threads with information and discussions about this version: http://forums.trossenrobotics.com/s...
http://robosavvy.com/forum/viewtopi...
http://forums.trossenrobotics.com/s...

Next time, I'll talk a little about the first prototypes of USB2AX, I had some real fun doing this...