USB2AX
By Xevel on Thursday, November 24 2011, 18:06 - USB2AX - Permalink
It's about time I talked about this one. This post has been a work in progress for more than 6 months!
The idea behind the USB2AX
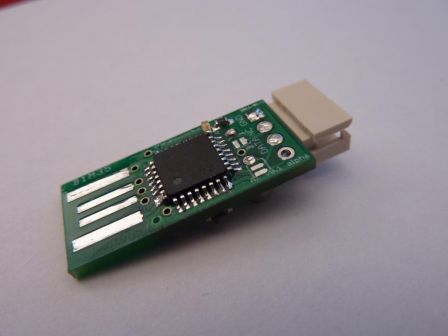
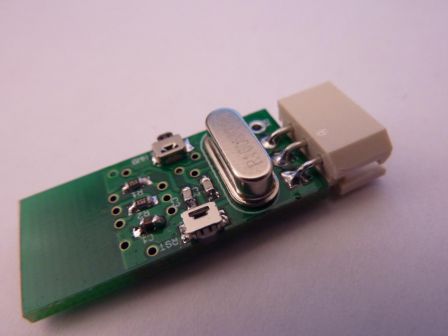
The USB2AX board is the small programmable USB to AX and MX-series Dynamixel adapter we designed with my friend JLG, in the early stages of developing the Xachikoma.
Basically, it's a gizmo you plug into an USB port that creates a virtual COM port on your computer, through which you can communicate to Dynamixel servos. It behaves much like the USB2Dynamixel made by Robotis (in most cases, it's a drop-in replacement), but is limited to AX and MX series servos. It does not provide power to the servos, this has to be done by other means like using a SMPS2Dynamixel Adapter or a home-made power cable.
I made the design (mostly from things I learned from the Arduino Uno and Adafruit ATmega32u4 Breakout Board+, but adding my own n00b mistakes), and he made the first versions PCB, under the constant pressure of me asking to make the board smaller, SMALLER, SMALLER!
Making such a beast is far from being a new idea, yet my version is the smallest of the "clean" ones I know of, and it's more versatile than most. I would not have made it if I did not have a real need of it: I use 4 of them in the Xachikoma.
The core of the project is an ATmega32u2, a 8 bits micro-controller from ATMEL without much bells and whistles, but with a full-speed USB device port and an UART. Its little brother, the ATmega8u2, is used to replace the FTDI in the Arduino Uno, and its bigger cousin the ATmega32u4 will be the heart of the upcoming Arduino Leonardo. Having a micro-controller do the bridge between USB and the half-duplex serial bus used by Dynamixel actuators is interesting for two reasons: you can use software tricks to create the half-duplex line instead of having multiple components, and you can create more complex firmwares which not only channels bytes from one side to the other, but can perform treatments on them.
The half-duplex trick used here is the same some people use to make an Arduino talk to Dynamixels by just tying TX and RX together. This is also used by the Arbotix controller and others, just to name a few sources you can learn from. The idea is that in the ATmega, you can turn ON and OFF each part of the UART (receive, transmit), and when one is not used, the corresponding pin can be left floating (meaning it does not impose a particular logic level to what it's connected to). This way, you can leave the receiving part ON most of the time, and switch to transmitting mode only when you have bytes going from the computer to the servos.
The ability to update and experiment with the firmware is potentially a great strength: not only can you optimize the inner workings to lower the latency (compared to the usual FTDI chip), but you can also add nifty features by allowing the USB2AX to understand what it receives and to react to it. Instead of only transmitting bytes blindly, you can imagine implementing macro commands, like a SYNC_READ (iBot has done so). Another possibility is to change completely the way the computer sees the board. For example, you could make a joystick with force-feedback based on Dynamixels, and program the USB2AX to appear to the OS as a plug&play joystick, allowing seamless use of your über-joystick in any game!
Some inspirational material around the topic of "stuff speaking with the dynamixel actuators":
http://billyzelsnack-robotics.blogs...
http://billyzelsnack-robotics.blogs...
http://www.siempreaprendiendo.es/pr...
http://www.pablogindel.com/2010/01/...
http://websvn.hylands.org/listing.p...
http://robosavvy.com/forum/viewtopi...
Latest developments
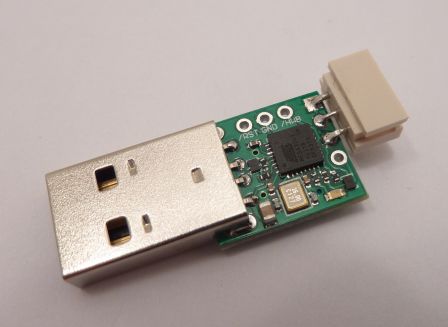
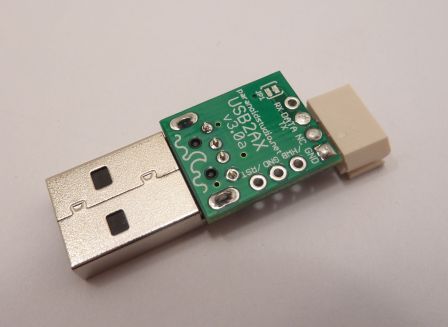
The latest version is the V3.0a (V2 never actually lived :/), and improves durability and reliability while still keeping a small form factor. Basically, this version should be roughly on equal footing with the USB2Dynamixel from Robotis when it comes to communicating with AX-series Dynamixels, just smaller and with slightly lower latency.
With a real USB plug, the risk of shoddy connection should be reduced close to zero. This causes a problem however, as the standard male Type A USB plugs are 20mm long, more than twice the size previously allocated to the plug and more than two third of the total length of the original board! That's why we remade the PCB from scratch, with better layout, smaller traces and smaller components where possible (0.5mm pitch QFN package for the ATMega32u2, small SMD crystal, 0402 capa and resistors...), even if it means that it can no longer be assembled with the good old soldering iron. That's an opportunity to practice reflow soldering with a hot plate, yeah :D Also added from the first versions are the recommended decoupling caps (!) and ESD protections on both USB and serial lines, to reduce risks of frying the board or any of the costly equipment connected to it.
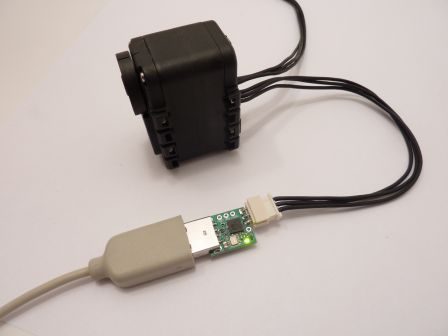
a V3.0a, plugged and connected to an AX-12+.
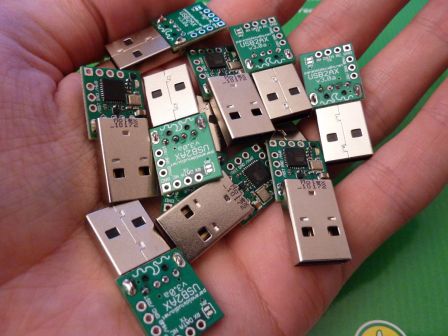
It took me a few afternoons to make all of these, mostly by hand...
USB2AX documentation, schematics, BOM, code
(and if you may wonder: ParanoidStudio is the name under which we hack robotics stuff with this friend).
I still have a few units of the improved version (better quality and durability). If you are interested in buying one, please say send an email at xevel {at} xevel |dot| fr ! A commercial version will most likely see the light of day in a few weeks/months too.
Some threads with information and discussions about this version:
http://forums.trossenrobotics.com/s...
http://robosavvy.com/forum/viewtopi...
http://forums.trossenrobotics.com/s...
Next time, I'll talk a little about the first prototypes of USB2AX, I had some real fun doing this...
